2. Project management
This week I worked on defining my final project idea and started to getting used to the documentation process.
Introduction
I have never worked with Git before so it was rather difficult for me to start.
First I looked at FabLab website of other students from the years before. In one of the websites I found a link to this website and this cheat sheet. I read through the articles and felt a little more confident afterwards.
Website setup
Registration and Setting up GitLab Access
I sarted the setup following the lecture. First I registered to GitLab. After that I generated a SSH-Key and added it to GitLab for a secrue access.
ssh-keygen -t ed25519 -C "Name of the key"
As far as I understood, the SSH-Key acts like a secure digital ID card, allowing GitLab to recognize my computer and let me push and pull code safely without entering my password each time.
This created two files:
-
id_ed25519 (the private key, stored securely on my computer)
-
id_ed25519.pub (the public key, shared with GitLab)
I opened the .pub file with a text editor, copied its entire content, and pasted it in GitLab under: User Settings → SSH Keys → Add new key, then clicked Add Key.
Forking and cloning repository
Next, I forked the project repository. Forking creates my own copy of the project so I can make changes without affecting the original repository.
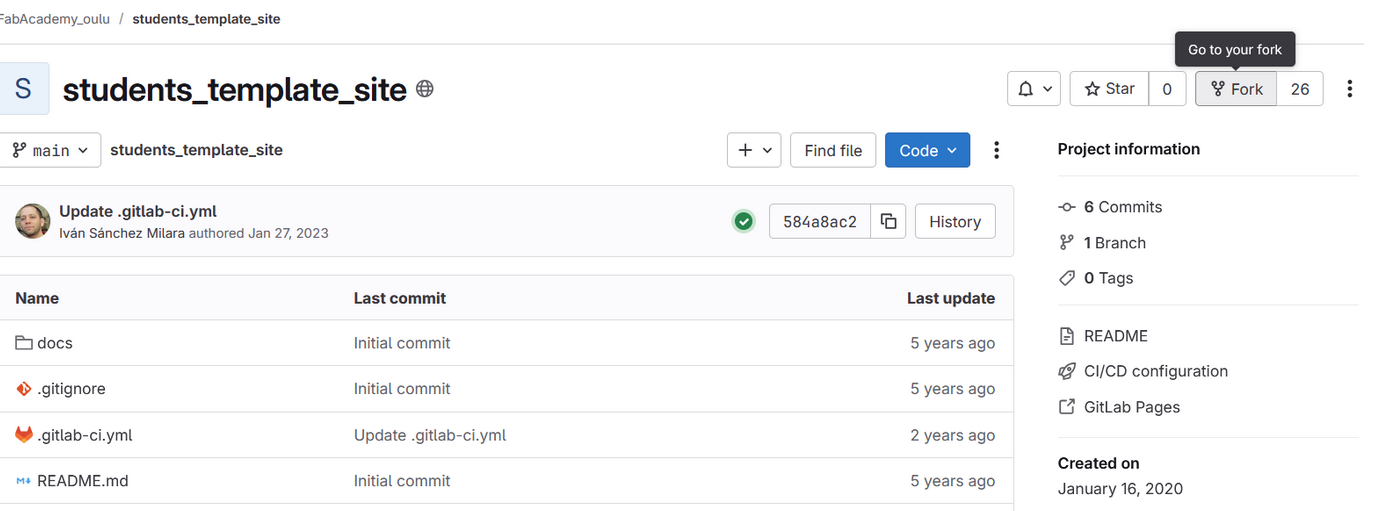

After forking, to clone the repository I copied the name of the clone from gitlab.fabcloud.org.
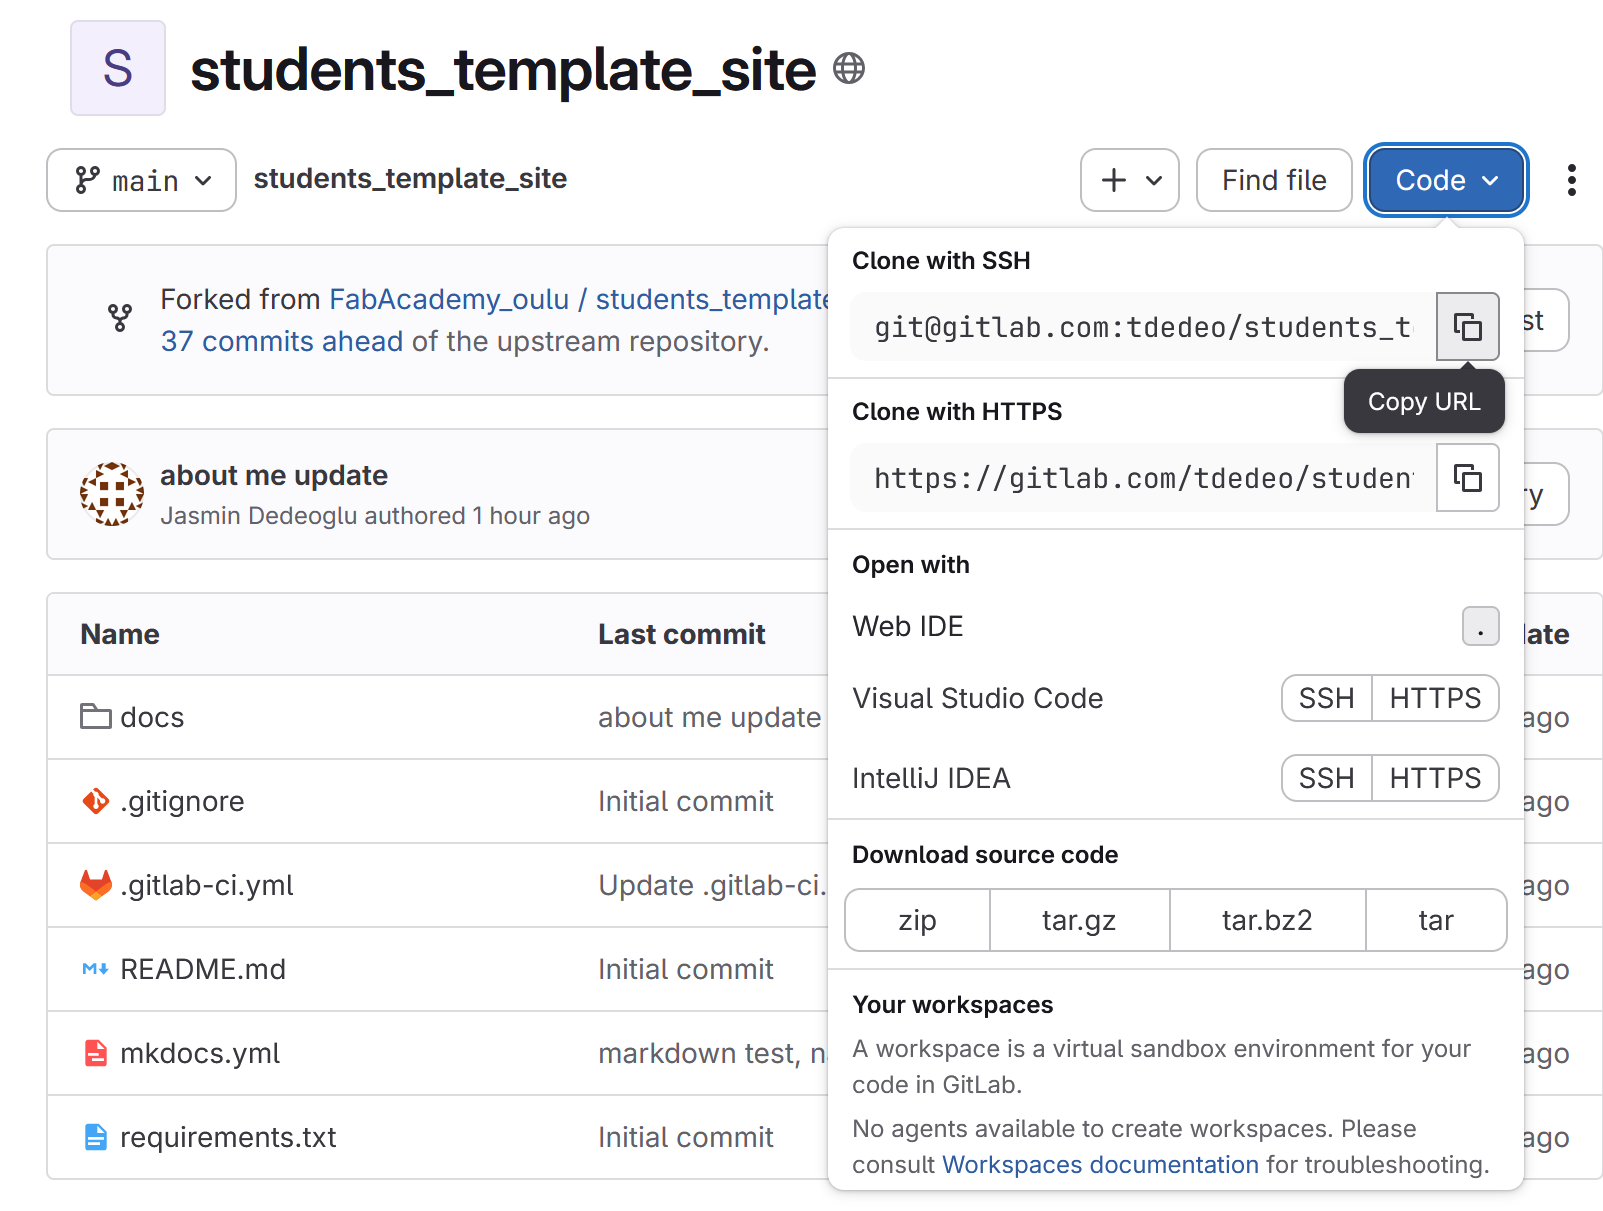 Cloning downloaded all the project files to my machine, so I could work on them locally.
I went into the folder intended for use as my local repository, opend GitBash in there…
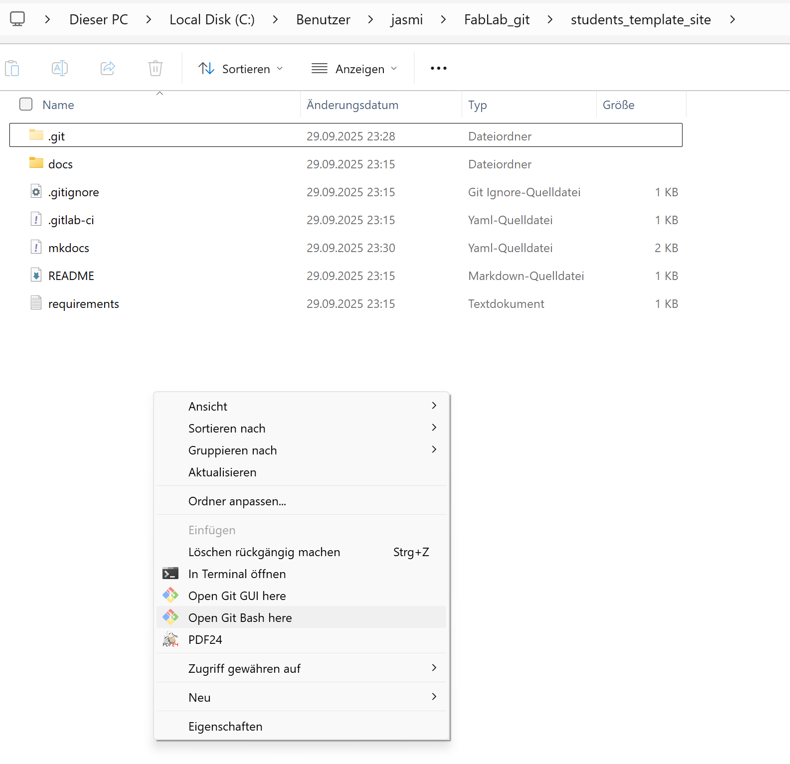 …and cloned the Fab Academy repository into it.
git clone Name_of_the_clone
Basic commands
If navigating to the main directory now, I can use regular Git commands to pull, add, commit, and push changes to the repository.
To fetch changes from the remote repository and integrate them with the local branch:
git pull
Tell GIT to take a snapshot of the contents of all files under the current local directory in a local temporary staging area:
git add --all
To permanently store the contents of the staging area in the local repository:
git commit -m "description of modification"
To upload the local commits to the remote repository gitlab.fabcloud.org:
git push
MkDocs
I’m adittionally installed mkdocs and mkdocs-material to access the website and see the local changes I made to see how it looks like before uploading it.
MkDocs is a static site generator — it takes simple text files written in Markdown (.md) and turns them into a website. Markdown is a lightweight format used to structure text with headings, lists, links, and images using plain text syntax.
For example:
# Heading
**bold text** and *italic text*
MkDocs uses themes to define how the website looks. The default theme for Fab Academy is mkdocs-material, which provides a clean and modern design.
Installing MkDocs
For the installation I used the following commands in the System Terminal:
pip install mkdocs
and
pip install mkdocs-material
To access the local website, I have to open the Terminal in my repository and type in:
mkdocs serve
This launches a local web server. In the terminal it shows a link like:
Browser connected: http://IP-Adress/
Modifying Website Contents
All website pages are Markdown files located in the ‘docs’ folder.
I open my website project in Visual Studio Code and use the file explorer to find and edit the page I want to change.
Here are some useful markdown syntax:
# Header
adding pictures: {width="50%"}
create a table: | table content 1 | table content 2 |
link a website: [](website url)
download file: [Download file](../files/document.pdf)
link a video: <video controls width="400">
<source src="/videos/video.mp4" type="video/mp4">
</video>
After editing and saving the file, I can refresh my local website preview to see the changes immediately. Once I’m satisfied, I push the updates to GitLab using:
git add --all
git commit -m "Updated homepage content"
git push
Configuration Files
mkdocs.yml
This file controls how the website is built and organised. It defines the site title, navigation structure and theme. MkDocs reads this file every time it builds the website. The basic setup was already included in the version of the website I forked, so I didn’t have to create it by myself.
For example, part of my mkdocs.yml looks like this:
site_name: Fab Academy Jasmin Dedeoglu
site_description: My Fabacademy site

site_author: Jasmin
docs_dir: docs
site_dir: _site
copyright: Creative Commons Attribution Non Commercial
theme:
...
I only made small changes to this file, like updating my site name and author and checking the colour palette.
.gitlab-ci.yml
This file tells GitLab how to automatically build and publish the website every time I push changes. It’s part of GitLab’s CI system - a kind of automation tool.
When I type ‘git push’, GitLab reads this file and follows the instructions inside. It uses a lightweight Python environment, installs everything listed in the requirements.txt file (like MkDocs and the Material theme) and then builds the website using ‘mkdocs build’
After building, it moves the generated website files into a folder called public which GitLab automatically publishes online. The file also specifies that this process should only run when I push changes to the main branch of my repository.
I didn’t make any changes to this file: the version included in the Fab Academy template already works well for building and deploying the site.
Useful stuff about this website provided by FabLab…
How to edit it
You can edit it on Gitlab. The software used turns simple text files written in Markdown format, into the site you are navigating.
No worries, you can’t break anything, all the changes you make are saved under Version Control using GIT. This means that you have all the different versions of your page saved and available all the time in the Gitlab interface.
In short
- This website is built automatically by gitlab every time you edit the files in the docs folder
- It does so thanks to Mkdocs a static site generator written in Python
- You must start customizing the file
mkdocs.ymlwith your information - You can change the looks of your website using mkdocs themes, you can find in the
mkdocs.ymlthe options for the Material Mkdocs theme - If you want to start from scratch, you can delete everything (using git-rm) in this repository and push any other static website